Wednesday 27 March 2013

Chocolate Muffins


Ever since I started baking, I have become a muffin snob. And I believe I am not alone. Let me share a little story with you. Some time last year (I always have old stories) I had a case of a muffin snack attack during a work day. I looked at my watch. It was a little over 2 hours before lunch. I couldn't wait to go to the bakery which was a short distance away from my office. And oh, it was chocolate muffins that was calling my name.


As I was walking to the bakery, I reminded myself that I have to be mindful of my diet. Muffins go straight to my belly and thighs. Somehow my digestive system has a direct portal to all the wrong places. I was in two minds as to whether I should give in to my craving or give it a miss. Right there and then a SYT (Sweet Young Thing) walked past me. She was stick thin. And I mean stick thin. "Mahdahm, surely you don't want to be that thin", the devil whispered into my ear. Straight away I walked into the bakery.


I was quite happy to pick up one chocolate muffin (RM3.50). Yes, just one thank you (a very rare thing thing indeed, I usually take two). I also picked up my usual "chap fan" (mixed rice) on my way back.

Back at the office, I was very eager to sink my teeth into the muffin. As I bit into the muffin and chewed, I froze. The muffin was fresh but it tasted.......how shall I say it......empty, disappointing, like something was missing. I mean, I used to like that muffin but somehow it's not the same anymore. Then I realized what had happened. These muffins were no match for my homemade ones. I mean really. "POM! POM! POM!...", that's my auntie telling me that I am blowing my own trumpet.


I took another bite and that was it. Into the bin it went. How's that for snobbery?
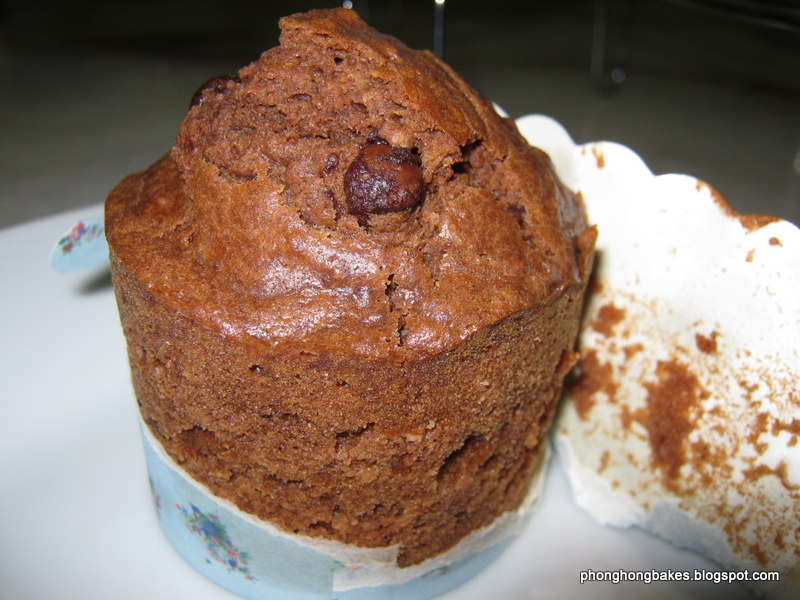
Chocolate Muffins
Recipe source : Adapted from Joy of Baking
Makes 12 regular sized muffins

Ingredients :
- 230grams self-raising flour
- 30grams unsweetened cocoa powder
- 170grams chocolate chips
- 1/2 cup brown sugar
- 113g unsalted butter, melted and cooled
- 2 large eggs
- 240ml buttermilk
- 2 teaspoons vanilla extract

Method :
1. Preheat oven to 160C
2. Line muffin pan with 12 paper liners
3. In a mixing bowl, sift the flour and cocoa powder together. Then stir to evenly mix and stir in the chocolate chips.
4. In another mixing bowl, mix brown sugar, butter, eggs, buttermilk and vanilla extract.
5. Using a spatula, fold the wet ingredients into the dry ingredients and gently stir until just combined.
6. Using an ice-cream scoop, evenly fill the muffin liners.
7. Bake for 20-25 minutes or until a toothpick inserted into the center of a muffin comes out clean.

Monday 25 March 2013

Corned Beef Omelette with Cherry Tomatoes and Basil


My earliest memory of corned beef was my grandma's corned beef omelette and corned beef sandwich. Grandma used to fry the omelette with lots of onions and some red chillies. Simple and good. As for the sandwich filling, simply mince lots of shallots and mix it into the corned beef with a good squeeze of lime juice. To me, it is so delicious.

When I open up a can of corned beef, I usually empty the contents into a container and roughly slice it while it is still soft. Once refrigerated, it will harden and having it in slices makes it easy for me to portion it out. I had two slices leftover during a weekend and decided to change grandma's recipe a little bit.


I know big onions is a must for flavour and sweetness and to that I added cherry tomatoes, green chillies and Italian Basil. I usually use red onions but this time I decided to try Bombay  onions after seeing Suituapui use it in his recipe here. And oh, I also put one big portobello mushroom into the omelette.


I have made this omelette previously but without the mushroom and instead of Italian Basil, I used our local daun Selasih. Also I used red onions. As far as I am concerned, I prefer red onion as it has a stronger aroma and taste. And I prefer daun Selasih as it is milder than the Italian variety.


This version with mushrooms, Bombay onions and Italian Basil. I may have put too much basil :)

This version without mushrooms and with red onions, green chillies and daun selasih. I prefer this one.

I also added a slice of cheese this time round. I am not good at flipping omelettes and I just folded it over when it was almost set. For added flavor, I garnished with extra basil and cherry tomatoes when serving. It made for a very satisfying meal.


Corned Beef Omelette with Cherry Tomatoes and Basil
Recipe source : Phong Hong
Ingredients :
- 4 eggs, beaten
- Corned beef (as much as you like)
- 1 big onion, sliced
- a handful of cherry tomatoes
- 1 portobello mushroom, sliced
- Some black pepper
- Basil leaves (as many as you like)
- 1 slice of Cheddar cheese
- Oil for frying

Method :
- Heat oil in pan and saute the onions until wilted.
- Add corned beef, break it up and mix with the onions.
- Even out the mixture on the pan and pour in beaten eggs.
- Put in the cherry tomatoes.
- Add a dash of black pepper.
- When the omelette is almost set, put in cheese and scatter basil leaves on top.
- Fold the omelette over and continue to cook until fully set.
- Dish out and garnish with sliced cucumbers and more basil leaves.
- Serve with white rice or bread.


This post is linked to the event, Little Thumbs Up organised by Doreen of My Little Favourite DIY and Zoe of Bake for Happy Kids.

Saturday 23 March 2013

Oyster Sauce Chicken : Microwave Method


This incident happened to me last weekend and I wrote the post immediately after lunch. At the same time, I had the flu. Double whammy! Read on : 

My gas tank is empty and so is the spare tank. Yaaarghh!!!!! Sure I could call the provision shop and have the nice uncle bring me another 2 tanks. But I didn't want the hassle of waiting because the uncle might show up a couple of hours later. My lunch couldn't wait. It's my fault really. I should have ordered another tank when I used up the spare. But, you know, sometimes I forget. Hmmm.....Luckily there's the microwave oven.


I have not been cooking using the microwave oven for a very long time. These days, the main function I use is the convection oven mode when I bake. Or to heat up food when I am in a hurry. I first experimented with microwave cooking many years ago when I was house sitting for my auntie. At the time, I was a student studying for my professional exams.


This is how I cooked the oyster sauce chicken. I placed my minced garlic and sliced ginger into a corningware dish and mixed them with two tablespoons of oil. Then I zapped the dish, uncovered for 1 minute. After that, I stir the garlic and ginger and zap again for 1 minute.


Once that was done, I put in the marinated chicken pieces  into the dish and stirred to mix it with the garlic and ginger. I covered the dish and zapped for 2 minutes. Then, I take the dish out and removed the lid carefully (be careful the steam can be very hot and sometimes the oil can spatter) and stirred the chicken. Repeat zapping for another 2 minutes, remove, stir and zap for a final 2 minutes. Then I just left the dish covered for the chicken to cook further using residual heat.


Next, the vegetables. I bought a bunch of spinach and I would usually just fry it with garlic and salt. I crushed a few cloves of garlic and removed the skin, leaving the garlic whole. Then I put it into a corningware dish and mixed the garlic with a tablespoon of oil.


I zapped the garlic in the microwave for 1 minute, removed the dish and put in the spinach, mixing it with the garlic. Zap for 2 minutes covered, and stir. Zap for another 1 minute, remove the lid and stir the spinach. Let it stand for a few minutes to cook on residual heat.


Oh, forgot to add salt to my vegetables but that is alright because I have a bowl of soya sauce with black vinegar and raw garlic and chilli padi. That is my favorite condiment when eating dishes like this.

So how did the dishes taste? Well, nothing beats the wok. The aroma of browned garlic and ginger was missing but the chicken was very tender. It was not overcooked. The vegetable tasted bland as there is none of the usual fried garlic and salt aroma and taste. But still, it was edible and at least I was able to put food on the table.

Just in case you are interested to cook using the microwave or are caught with your gas tank empty, here's the recipe for what I cooked.

Chicken Oyster Sauce
Recipe Source : Phong Hong

Ingredients :
- 2 chicken thighs, cut into bite size pieces
- 1 tablespoon oyster sauce
- 1 tablespoon light soya sauce
- 1 tablespoon dark soya sauce
- 2 tablespoons Shao Hsing wine
- 5 cloves garlic, minced
- 10 thin slices ginger
- 2 tablespoons cooking oil

Method :
1. In a mixing bowl, add chicken, oyster sauce, light soya sauce, dark soya sauce and Shao Hsing wine. Mix well to coat and set aside for 20 minutes.
2. Put garlic and ginger in a corningware dish and mix with the oil.
3. Microwave uncovered for 1 minute and stir.
4. Microwave for another 1 minute.
5. Add marinated chicken pieces and stir to mix with the garlic and ginger.
6. Cover the dish and microwave for 2 minutes.
7. Remove the cover and stir.
8. Cover the dish and microwave for another 2 minutes.
9. Remove the cover and stir.
10. Cover and microwave for another 2 minutes.
11. Keep the cover on and remove from the microwave and let stand for 5 minutes before serving.

Spinach with Garlic
Recipe Source : Phong Hong

Ingredients
- 1 bunch of spinach (bayam)
- 5 cloves garlic, smashed and left whole
- 1 tablespoon oil

Method :
1. Put garlic into a corningware dish and mix with oil.
2. Microwave for 1 minute uncovered. (Can add salt to taste after this, I forgot)
3. Add spinach and toss to mix with garlic and oil.
4. Cover the dish and microwave for 2 minutes.
5. Remove cover and toss the spinach.
6. Cover and microwave for another 1 minute.
7. Remove cover and let stand for another 2 to 3 minutes before serving.

Wednesday 20 March 2013

Marbled Banana Bundt Cake


I have been searching for a good banana cake recipe for the longest time. And believe me, I have collected a few recipes but as usual I sat on it. But when I saw Ann's very unusual looking Best Banana Bundt Cake, I was immediately sold! This recipe is originally from Dorie Greenspan's cookbook "Baking : From My Home to Yours". Ann said that this recipe has gotten very good reviews and it is in her opinion that this recipe is awesome and definitely a keeper.


It was just as well that I had plenty of ripe bananas leftover after I baked my Nutella Banana Muffins. I also bought a tub of sour cream. My auntie told me that sour cream is an important ingredient in banana cakes, and this recipe uses 200g of sour cream. Of course I did not want to be left with 50g of leftover sour cream so I just dumped the whole tub in. And as usual, I like to be a busybody and mess around with other people's recipe. My friend K. Nor refers to this as an "act of treason" (menderhaka) to the original recipe. Something that she does every now and then hee..hee...


I decided to make this banana cake into a chocolate marbled banana cake as I love the combination of chocolate and bananas. Besides, I wanted to try out the marbling techniques that I have watched on You Tube. I also wanted to bake this cake in a bundt pan so that the pan that my auntie gave me would be well used.


Whenever I am trying out a new recipe, I tend to get nervous.  However, my fears were unfounded with this lovely cake. It is always exciting to remove the cake from the pan. When I flipped it over, it came out very easily and I can't tell you how happy I was when this came out :


It smelled so wonderful, the mingling of chocolate and bananas and when I tasted my first slice, mmmm....I nodded my head in appreciation. Ann was right. This banana cake is awesome and is a keeper. It is moist, full of flavors and is a delight to the senses. I will definitely be baking this cake again. And maybe next time, I'll be a little bit extravagant and drizzle some chocolate ganache over top. Oooo....can't wait for that!


Marbled Banana Bundt Cake
Recipe Source : Adapted from Anncoo Journal

Ingredients :
- 300g self-raising flour
- 250g butter
-150g sugar
- 2 teaspoons vanilla extract
- 2 eggs
- 4 very ripe bananas (about 370g without skin), mashed
- 1 tub sour cream (250ml)
- 2 tablespoons cocoa powder mixed with 3 tablespoons hot water to make a paste

Method :
1. Preheat oven to 160C
2. Butter and flour the bundt pan and set aside
3. Sieve flour in a mixing bow and set aside
4. In a mixing bowl, beat butter until creamy. Add sugar and continue beating until pale and fluffy.
5. Beat in vanilla, and add eggs one at a time, mixing well after each addition.
6. Fold in mashed bananas (from here onwards I used a spatula to fold)
7. Mix in half the flour, fold gently and add all the sour cream followed by the remaining flour. Mix well.
8. Divide batter into two.
9. Mix one portion with the cocoa paste.
10. Alternate dollops of the plain batter and chocolate batter until all batter have been used up.
11. Using a butter knife, gently swirl the batter.
12. Bake for 65-75 minutes or until a skewer inserted into the center of the cake comes out clean (My cake was done in 45 minutes).
13. Put cake pan on a cooling rack and wait for 20 minutes before unmoulding the cake onto a rack to cool to room temparature.

Monday 18 March 2013

Tomato Beef


This recipe comes from Chinese Cooking for Dummies by Chef Martin Yan. Hah! Hah! Hah! Why do I need a dummies series for Chinese cooking? Well, that's because the food that I grew up with is Nyonya and Malay and some Indian. I only get to eat authentic Chinese food when I dine at the restaurant. As I mentioned in this post, I wanted to get in touch with my roots. I appreciate good Chinese food but sadly, I don't know how to cook most of the dishes.


One of the recipes that caught my eye was Tomato Beef. At first I thought it was a stew but upon reading I realized that it is a stir fry dish with a tomato based gravy. I have ear marked the recipe for about 3 years now but never got round to trying it. That is classic Phong Hong. Lack of motivation to try new recipes. And thanks to Little Thumbs Up, I am finally cooking this dish.

I have never stir fried beef before and the only way I cooked beef previously was by stewing or curry. So I was a bit nervous. I knew that I would have to buy a cut that is meant for stir frying. The recipe calls for tri-tip or New York steak (I have no idea what that is) and upon checking the beef section at Aeon, I settled for a rump steak.


And of course, another important ingredient is a medium sized ripe tomato. I found some big ripe tomatoes and put that into my trolley. I also got myself a green pepper. All the other ingredients for the sauce were already available at home.


I noted that there are no onions, garlic or ginger in the recipe. I thought it was rather strange and I could have added  those into the dish but I decided to trust Chef Martin Yan and follow the recipe as is. The sauce ingredients are chicken broth, tomato ketchup, hoisin sauce, brown sugar and chilli garlic sauce. 


There were two ingredients that I didn't have which is chicken broth and chilli garlic sauce. So I just used water and chilli bean paste (toban djan). This dish is very easy to cook - just stir fry the marinated beef, toss in the green peppers and tomatoes followed by the sauce.

To my relief, the beef was tender and I loved the flavor of the sauce. However, in my future attempt I will include ginger, garlic and onions. Not that there is anything wrong with the original recipe, but I feel that the addition of ginger, garlic and onions will enhance the flavors of this dish. I give this dish my thumbs up and I will definitely cook it again.


Tomato Beef
Recipe Source : Chinese Cooking for Dummies by Chef Martin Yan (page 191)
(My adaptations are in red)

Ingredients :
- 3/4 lbs (about 340g) beef (tri-tip or New York steak), cut into 1/2 inch cubes (I used 420g rump steak and thinly sliced)
- 2 tablespoons oyster-flavored sauce
- 2 tablespoons Chinese rice wine
- 1/3 cup chicken broth (I used water)
- 3 tablespoons ketchup(I used 4 tablespoons)
- 1 tablespoon hoisin sauce
- 1 tablespoon packed brown sugar (I used 1 teaspoon)
- 1 teaspoon chilli garlic sauce (I used chilli bean paste)
- 1.5 tablespoons cooking oil
- 1 cup diced green bell pepper (1 inch pieces)
- 1 medium ripe tomato, cut into 8 wedges and then halved

Method :
1. To make the marinade, combine the oyster-flavoured sauce and rice wine in a bowl.
2. Add beef and stir to coat. Let stand for 10 minutes.
3. To make the sauce, combine chicken broth, ketchup, hoisin sauce, brown sugar and chilli garlic sauce in a bowl.
4. Place a wok over high heat until hot.
5. Add oil, swirling to coat the sides.
6. Add the beef and stir fry until no longer pink, about 1.5 to 2 minutes.
7. Add the bell pepper and tomato; stir fry for 1 minute.
8. Add the sauce and bring to a boil.
9. When sauce is slightly thick, dish out and serve immediately.


This post is linked to the event, Little Thumbs Up organised by Doreen of My Little Favourite DIY and Zoe of Bake for Happy Kids.

Wednesday 13 March 2013

Cream Cheese Pound Cake


When I started baking in 2011, I was very attracted to this Cream Cheese Pound Cake which was featured in Joy of Baking. I consider Stephanie Jaworski my baking teacher because I learnt baking by watching her video demonstrations. It's funny when I think of why I was so taken by this cake. It was the shape (it is baked in a bundt pan) and color (golden brown crust and yellow interior) that made it so attractive. I was disappointed that there is no video demo for this cake (up to today there is none yet) but I bravely attempted it anyway.


The first time I baked this cake (and I baked it many more times subsequently), I baked it in a 9" deep square pan. It is a big cake and I remember struggling with my hand mixer when I added flour into my egg, sugar, butter and cream cheese mixture. My mixing bowl was too small and I was too inexperienced to anticipate this problem. The batter was stuck to my mixer paddles and it was quite a mess! But lo and behold, the cake turned out and my partner pronounced the cake "powerful!". Beginner's luck was on my side :)


But I was not so lucky on some other occasions. My main problem was the mixing of the batter. Sometimes the uneven mixing resulted in certain dense oily spots. But still, the cake was edible and well received. Now that I have gained more experience and am much better at baking, I decided to bake this cake again. But this time in a bundt pan. And this is the first time that I am using a bundt pan, inherited from my beloved auntie. Thank you, Ee-Ee!


This being a pound cake, the cake is on the dense side. It is however, moist and soft but not fluffy. My auntie has tried this cake but she did not like the dense texture. She prefers the fluffy type of butter cake. But this is just a matter of preference. I like fluffy cakes but if a cake is meant to be dense but has good taste and flavor, I can accept it.

Tastewise, this cake is very buttery and delicious. I can't detect the cream cheese at all, I guess all it does is add to the moistness of the cake. The recipe calls for lemon or orange zest but I left that out because I don't really like orange or lemon scented cakes.


I would say that this is a good cake if you love buttery cakes. It has a good aroma and is very rich. Definitely an indulgence and don't get carried away because it packs many calories. This would be a good cake to bake and serve when you have a good number of people around to share it with you.

The recipe below is reproduced in full with my adaptations in red.


Cream Cheese Pound Cake
Recipe Source : Joy of Baking

Ingredients :
- 3 cups (390 grams) all purpose flour (I used 300 grams self-raising flour)
- 1 teaspooon baking powder (I omitted)
- 1/2 teaspoon baking soda (I omitted)
- 1/2 teaspoon salt (I omitted)
- 1.5 cups (340 grams) unsalted butter at room temperature (I used 250 grams)
- 226 grams cream cheese, room temperature (I used 250 grams)
- 3 cups (600 grams) castor sugar (I used 150 grams)
- 6 large eggs, room temperature (I used 5 eggs because that was all I had)
- 1 tablespoon pure vanilla extract
- Zest of a lemon or orange (I omitted)

Method :
1. Preheat oven to 160C
2. Butter and flour a 10" (25cm) bundt pan and set aside.
3. In a large bowl, sift together flour, baking powder and baking soda.
4. In a mixing bowl beat the butter and cream cheese until smooth.
5. Add the sugar in 3 additions, beating well after each addition.
6. Add eggs, one at a time, mixing well after each addition.
7. Add the vanilla and lemon zest and beat until incorporated.
8. Add the flour mixture and mix just until incorporated.
9. Pour batter into prepared pan and smooth the top.
10. Bake for 1 hour to 1 hour 15 minutes or until the cake is golden brown and a toothpick inserted into the centre comes out clean. (My cake was done in 45 minutes)
11. Cool the cake in the pan for about 20 minutes before removing the cake to cool completely.

Monday 11 March 2013

Nutella Banana Muffins


Now, who was it who introduced me to this intoxicating chocolate spread? Oh yes, it was Jess who waxed lyrical about how addicted she is to Nutella. That was last year and at the time, I was still a Nutella virgin. And then there was Cathleen who made Nutella Swirl Banana Muffins. And I couldn't take it anymore. Nutella has been around for ages and I had not tasted it yet. Blame that on my less than perky sense of adventure. I mean I've seen jars and jars of Nutella on the supermarket shelves and yet it never occurred to me to pick at least a small tub to sample.


Maybe I couldn't accept the idea of having chocolate on my bread. Or hazelnuts for that matter. So I went over to 99 Speedmart and purchased a small 200g bottle for RM7.95. At home that evening, I placed the precious Nutella on the counter and didn't touch it until some 3 weeks later. How's that for enthusiasm? If there was a little blue pill for people with a flagging sense of adventure, I will be at the top of the prescription list.

Before baking.
What motivated me to finally open the jar was the expiry date. In another two months, I would have to toss the jar out. And there goes my RM7.95. Accountants don't like to waste money and I am very cost conscious (read prudent, not kiam siap/kedekut/stingy). I unscrewed the top, pulled off the protective flap and took a tentative sniff. MMMMmmmmm!!!!! I breathed in a waft of chocolate and hazelnuts and what a heavenly smell it was. Then I took a teaspoon and scooped some of the oooey gooey stuff and had my first taste of Nutella. Whoah! This is what I have been missing all these years! A revelation indeed. No wonder Jess got addicted.

Out of the oven.
A few days after that, I bought a loaf of bread, something I have not eaten for a long time. It was Gardenia's Wheatberry or something like that. The bread was fresh and soft and I had a few slices with Nutella. My God, when you haven't had your favorite carb for a long time and you pair that with Nutella, you are in BIG trouble. And right now in my pantry I have 2 big tubs of Nutella and a small one that's almost empty. The small one is almost empty not because I pigged out on it, but because I used it to bake these fantastic muffins.

Look at that! Banana+Nutella = Pahwah!
For my first Nutella bake, I settled on Cathleen's Nutella Swirl Muffins but I did not follow her recipe. I sort of adapted the recipe from my Banana Chocolate Chips and Mixed Berries Muffins which was of course adapted from Joy of Baking. This time instead of buttermilk, I used plain yogurt. I was very satisfied with the result as the muffins turned out very moist and fluffy. 


One heavenly bite. Just one :(
If you have been following my posts, you must be wondering, isn't she supposed to be on a low carb diet? Aren't muffins on the banned food list? If you look at the muffin up there, I took only one bite. OK, it was a big bite and I made my partner eat up the rest before I gave in to my Nutella bloodlust. And the rest of the muffins? They were given away to kith and kin. So no temptations in the house :)


Nutella Banana Muffins
Recipe Source : Inspired by A Taste of Madness and adapted from here
Makes 12 regular sized muffins

Ingredients :
- 230 grams self raisng flour
- 1/2 cup brown sugar
- 1/2 teaspoon ground cinammon
- 2 large eggs, lightly beaten
- 1/2 cup grapeseed oil (or any neutral tasting vegetable oil)
- 135ml plain yogurt
- 3 medium sized ripe bananas, mashed
- 1 teaspoon vanilla extract
- 12 generous teaspoons of Nutella

Method :
1. Preheat oven to 160C
2. Line muffin pans with paper liners
3. In a mixing bowl add sugar, ground cinnamon, eggs, grapeseed oil, yogurt, mashed bananas and vanilla extract. Stir to mix.
4. In another mixing bowl, sift flour and make a well in the centre.
5. Pour the wet ingredients into the flour and lightly fold until just combined. Do not overmix.
6. Scoop batter into lined muffins pans and top each muffin with a generous teaspoon of Nutella.
7. Using a butter knife, swirl the nutella in the batter.
8. Bake for 20 to 25 minutes.


I always check my muffins at the 20 minute mark and test by inserting a toothpick into the center of the muffin. For this bake, my muffins were done at 21 minutes. I was very pleased with this batch of muffins and they received very good reviews. I am sure you will love them too :)