Sunday 30 June 2013

Chocolate Orange Cake


I am in love with this cake. If I ever told you that I dislike orange flavoured cakes, I humbly take back my words. For the first time in my life, I zested an orange. My goodness, the heady scent of fresh oranges was very pleasing indeed. I thought I smelt love. This coming from someone who doesn't care much for oranges.

Orange ice-cream? Yuks! Orange juice? That I like. Orange cakes? No, thank you. That was me before this cake. After I added the orange zest to the cake batter, the aroma got even better. When the cake came out of the oven, the smell of oranges and chocolate was intoxicating. I couldn't believe my nose. Hah! Hah! 


My opinion of orange flavoured cakes changed forever when I took my first bite. I do sound over dramatic don't I? When I was a little girl, my mum baked me an orange cake. I still remember that cake. The middle part peaked like a volcano and it was for my birthday, I think. Being young, I had no prejudice against oranges and any cake would have made me happy. Besides, the only cake I ever ate in Terengganu was the horrible butter cake from the bakery. 
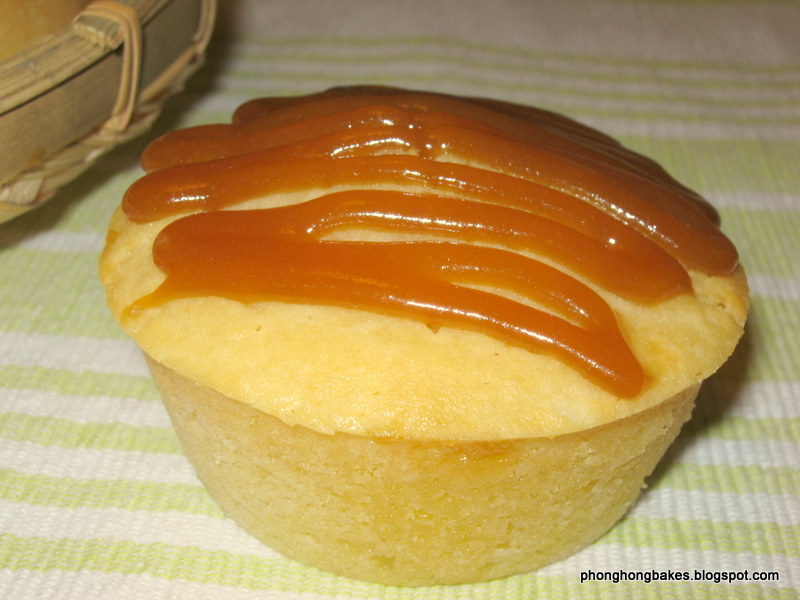
My first bake.

This is the second time I baked this cake. Yes, I love it that much. The first time, I overbaked it. At 40 minutes, it appeared to be done but I have a phobia for under done cakes. So I let it bake for another 10 minutes because the recipe said to bake for 50 to 60 minutes.

A bit dry because it was overbaked.

When I tried to unmould it, the cake wouldn't budge. Stuck because I did not grease the pan adequately. After a few taps, the cake came out but a small part got stuck to the pan. And because it was overbaked, some parts were a bit hard and crumbly. But still, it tasted very good.

It was fun alternating the two batters into the pan. The first time, I was very careful. The second time I was more trigger happy, dolloping here and dolloping there without a care in the world. 

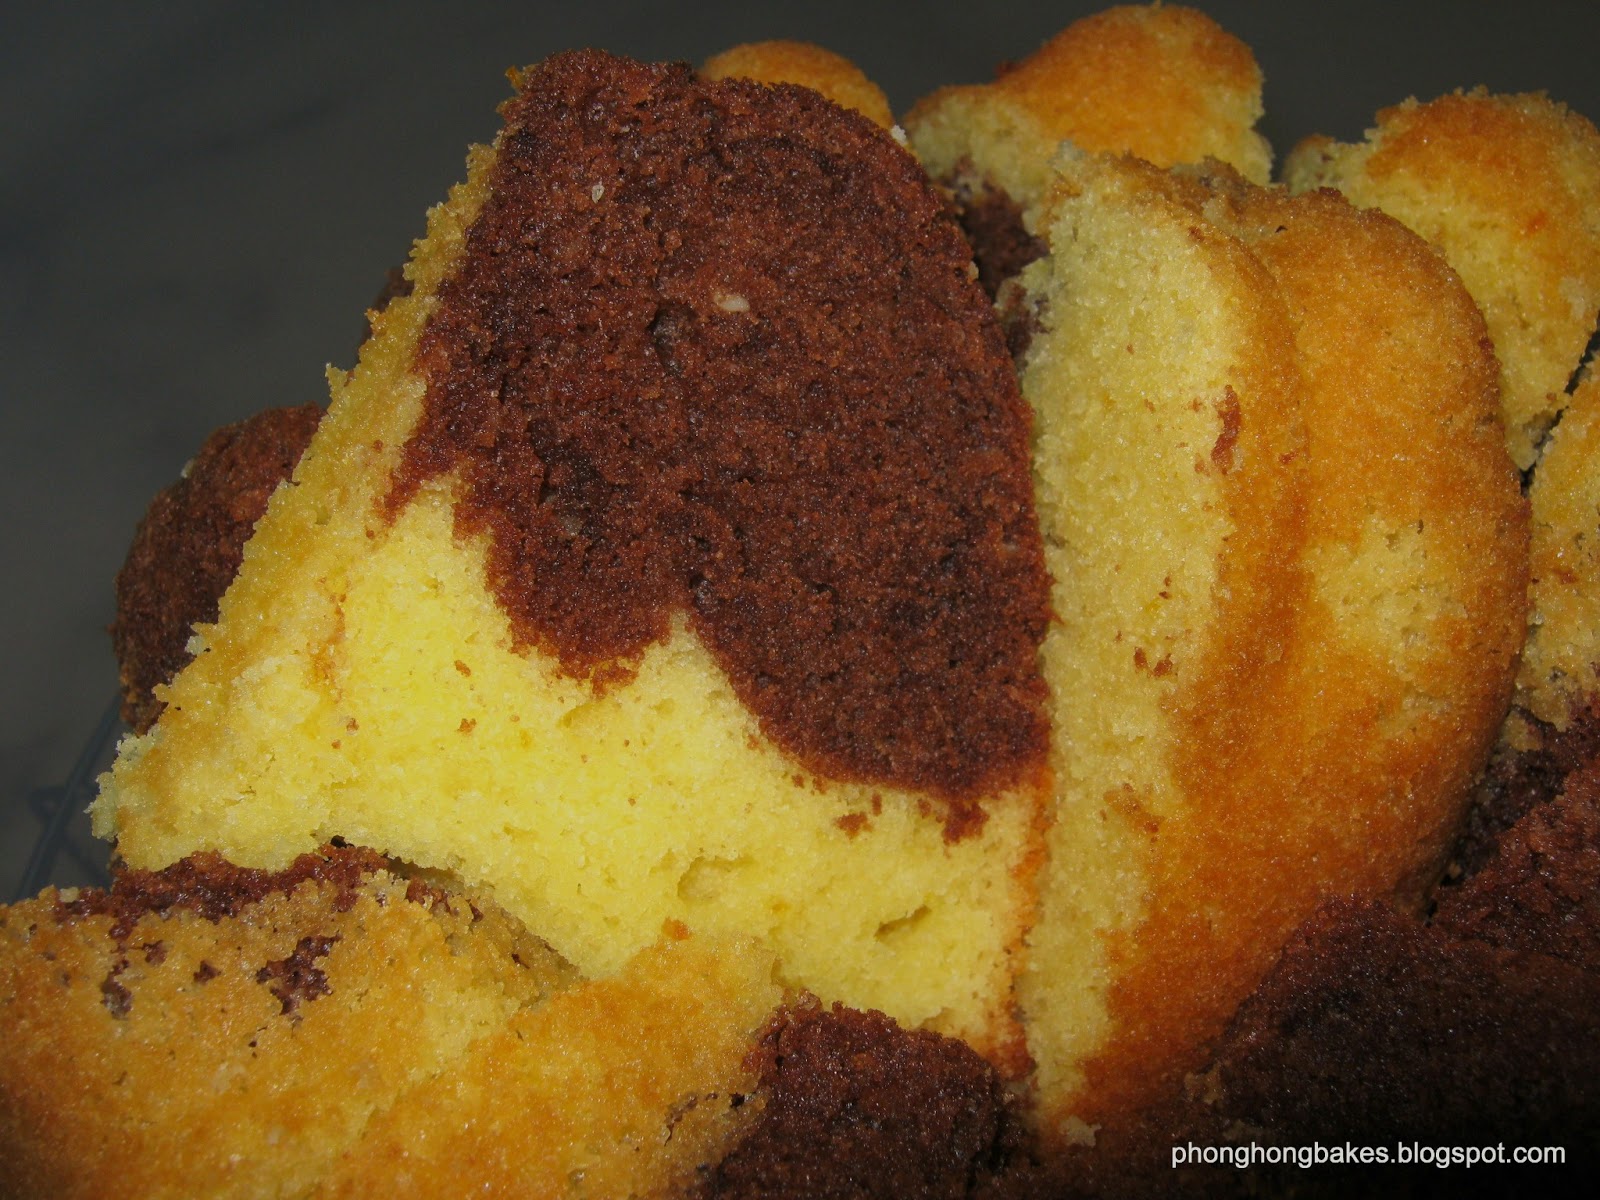
Reminds me of vanilla and chocolate ice-cream :)

To smooth the batter, I just gave it a few violent taps on the table top. Thump! Thump! Thump! Kau Tim! At 40 minutes the skewer came out with some wet batter. I let it bake for another 5 minutes and it appeared to be OK. With great faith, I removed it from the oven to cool.

Because I had generously buttered the pan, the cake came out immediately after it inverted it onto a plate. I was so happy. So happy that I broke the rule and ate two slices :) 

The marbling looks nicer than the first bake. 
The recipe calls for 250 grams of sour cream which I had in my first bake. But I was not so lucky the second time because I couldn't get sour cream from Aeon. I substituted with 250ml plain yogurt and it worked very well. So no worries if you can't or prefer not to use sour cream.

The texture of this cake is soft and moist. It tastes even better the next day. To me, this recipe is a keeper if you are into orange and chocolate combinations. Here's the recipe for the latest addition to my favourite cake list with my adaptations in red.


Chocolate Orange Cake 
Recipe source : Lovely Butter Cakes (page 16)
My modifications and notes are in red

Ingredients :

Ingredients A
- 200g butter (I plonked in the whole block of 250g)
- 200g caster sugar (I reduced sugar to 150g)
- 3 eggs
- 1 tbsp chopped orange rind (I zested the rind of 1 whole orange)
- 1 teaspoon vanilla essence.

Ingredients B (Combined and sifted)
- 250g plain flour (I used self-raising flour)
- 1 tsp baking powder (I omitted)
- 1 tsp baking soda (I omitted)
- 1/8 esp salt (I omitted)

Ingredients C
- 250ml sour cream
- 30g cooking chocolate (chopped and melted using double boiler)(I used 50g)

Method :
1. Preheat oven at 180C (I used 160C).
2. Grease a 9" baking mould with butter. (I used an 8 inch bundt pan which I buttered generously and sprinkled with flour. Then I set the pan aside in the fridge)
3. Beat butter and add sugar. Beat until soft and fluffy.
4. Add eggs one at a time and beat well after each addition.
5. Add orange rind and vanilla essence and beat till well combined.
6. Add ingredients B in four additions and sour cream in 3 additions. Beat well after each addition.
7. Take 1/2 of the batter and gently mix with the melted chocolate (do not overmix)
8. Alternate the plain and chocolate batter along the edge of the mould until all the batter is used up.
9. Bake in preheated oven at 180C for 55-60 minutes (Mine was done within 45-50 minutes at 160C)
10. Remove from oven and unmould after 10 minutes and let cake continue to cool.


This post is linked to Cook-Your-Books #1 hosted by Joyce of Kitchen Flavours.

Friday 28 June 2013

Mummy's Chicken Curry


It is true what they say. Mum's cooking is always the best. One of my favourite curries is my mother's chicken curry. I tried replicating this recipe in the past but was not successful.  It did not taste the same. So I asked my mum for her recipe and she delightfully obliged. Mum says to be generous with the onions or else the curry won't taste good. I have no problems with that because I love onions.


If your family loves potatoes, I would advise you to put more into this curry. It is always the star of the show and somehow everyone zeroes in on the spuds. My mother always serves this curry with either coleslaw or potato salad. Oh yes, we love our potatoes. And be sure to have loads of rice too.


Mummy's Chicken Curry
Recipe source : Phong Hong's Mum with some adaptations

- 3 big chicken legs, cut into 4 pieces each (about 900 grams)
- 4 potatoes, cut into quarters
- 1 big ripe tomato cut into quarters
- 3 big onions, thinly sliced
- 3 large cloves garlic
- 1 inch ginger
- 3 cardamoms
- 1 star anise
- 3 cloves
- 1" cinnamon stick
- 2 sprigs curry leaves
- 1 packet curry powder (25 grams)
- Yogurt or evaporated milk (amount depends on your preference)
- Salt to taste
- 400ml water (adjust to your preference for more or less gravy. I tend to put less because the chicken will release water during cooking)

Method :
1. Pound garlic and ginger. Set aside.
2. Mix curry powder with some water to make a paste and set aside.
3. Heat oil and saute sliced onions until wilted and slightly brown.
4. Add pounded ginger and garlic and continue to fry for a minute or two.
5. Add cardamoms, star anise, cloves, cinnamon stick and curry leaves and saute until fragrant.
6. Add curry paste and fry until well blended.
7. Add chicken and stir to coat with sauteed ingredients.
8. Add water, tomatoes, potatoes and bring to a boil. The simmer until chicken is cooked and potatoes are tender.
9. Season with salt to taste and add yogurt or evaporated milk according to the consistency that you like.


I am linking this post to the event, Little Thumbs Up organised by Zoe of Bake for Happy Kids and Doreen of My Little Favourite DIY and hosted by Ms B of Everybody Eats Well in Flanders.

Thursday 27 June 2013

Char Swee (MFF Penang)


This vegetable dish comes from Nonya Flavours (A Complete Guide to Penang Straits Chinese Cooking). I was very attracted to the vibrant colors. Besides, Stir-Fried Cucumber in Vinegar sounds interesting. 


It is a little bit like acar (pickled vegetables) but not quiet. The vegetables are stir fried in a sweet sour gravy mix and served immediately.


I quiet like this dish as it is light and the sweet sourish taste is quiet appetizing. However, I should adjust the flavors of the gravy mix to make it be more intense and thicker because the cucumbers released quiet a bit of water and diluted the gravy. 


I like the way the cucumbers are peeled alternately to create a nice pattern. I cooked this dish more than a month ago and forgot all about it until I saw Kimmy's version. Thanks for the reminder, Kimmy!


Char Swee (Stir Fried Cucumber in Vinegar)
Recipe source : Nonya Flavours (page 92)

Ingredients :
- 200g medium-sized prawns
- 2 tsp sugar
- 200g (1 medium sized) cucumber
- 80g (1 big) onion
- 20g (1) red chili
- 15g (1) green chili
- 60g (1 small) carrot

- 2 tsp oil
- 3 cloves garlic minced

Gravy (Mix together)
- 100ml water
- 2 tbsp vinegar
- 1 tsp Chinese plum sauce
- 1 tsp cornflour
-1 tbsp sugar
- 1/2 tsp salt
- 1/8 tsp pepper

Method :
1. Shell prawns, retaining the shells. Season with sugar and leave to marinate while preparing the rest of the ingredients but rinse off the sugar before cooking.
2. Run a peeler along the length of the cucumber and leave some space in between each peel to retain some skin for color variety.
3. Split the cucumber into two long halves . Use a spoon to scoop out the core, and slice diagonally to 0.5cm thickness.
4. Cut the onion into 6 segments.
5. Split the chilli into two halves, remove seeds and slice diagonally.
6. Peel carrot, halve it and slice diagonally.
7. Heat oil in wok and saute garlic until fragrant.
8. Add the prawns and stir fry until prawns are.cooked
9. Add cucumber and carrots and stir fry for a minute before pouring in the gravy ingredients. Stir until gravy thicken and boils.
10. Toss in onions and red and green chillies. Stir fry to mix well.
11. Adjust seasoning to taste before dishing out.


I am submitting this post to Malaysian Food Fest Penang Month hosted by Alan of Travellingfoodies.

Wednesday 26 June 2013

Spicy Fried Chicken


I had already sworn that I will not do any deep frying. But oh no, when I came across this Spicy Fried Chicken, I caved in. I mean, who can resist fried chicken, right? Besides, it made me think of the delicious fried chicken my brother ordered at Lotus Curry House. Though this recipe is not the same, I was still happy because it turned out delicious.


I marinated the chicken with the blended spices for the minimum two hours because I was short of time. Deep frying is always so boring. You know, standing there at the hot stove while the chicken is sizzling away. It seemed to take forever to turn golden brown. 

While my chicken wings were in the hot wokI did the unthinkable. I went to the living room to peek at the TV. Law & Order was on and that is my current favourite show besides CSI. I got carried away and when I ran back to the kitchen, heh..heh...my chicken wings got burnt. So next time, no more running away from the kitchen while cooking :)


Distracted cook burnt the chicken wings :(

I had some very nice red hot cili padi on hand and for some excitement, I decided to fry them too. The first four went into the hot oil and then...Pffth!...Pffth!....Pffth!...Pffth! The little zingers exploded one by one within seconds of each other. I should have know better than to pull a stunt like that. It was exciting all right, the last mini explosion had oil splattered all over my stove top. That's my second casualty of the day. Luckily, I didn't get hurt.

So I cut a slit in the next few cili padi so that they don't bomb me again. Last thing that went into the oil was my curry leaves. By the way, let's take a look at my curry plant. It is doing very well, thanks to Joyce, my curry plant has been resurrected from the dead.


The chilli padi and curry leaves are not in the original recipe, just my own addition. You can choose to leave that out.

I enjoyed the fried chicken very much. I took one bite of chicken and then one bite of chilli padi. Not only that, I also dipped the chicken with sweet chilli sauce. Wow, it was out of this world!


I am really pressed for time trying to get this post out as I have another curry recipe next in line. So here's the recipe below taken from The New Malaysian Cookbook with some personal adaptations.


Spicy Fried Chicken
Recipe source : Adapted from  The New Malaysian Cookbook (page 23)

Ingredients :
- 2 chicken legs, cut into 4 pieces each
- 4 chicken wings
- 100 grams cornflour
- 1 tablespoon thick asam jawa juice (tamarind juice)
- 1.5 teaspoons salt or to taste

Blended ingredients :
- 10 shallots
- 1 inch ginger
- 5 cloves garlic
- 2 tablespoons chilli paste
- 1 teaspoon pepper
- 1 small packet curry powder (25 grams) (can put more if you like)
- 1 teaspoon turmeric powder

Method :
1. Combine chicken with asam jawa juice, cornflour, salt and blended ingredients.
2. Marinate for at least 2 hours.
3. Heat oil and deep fry chicken pieces until golden brown and crispy.
4. Remove from oil and drain on paper towels.
5. Serve immediately with condiments of your choice.


I am linking this post to the event, Little Thumbs Up organised by Zoe of Bake for Happy Kids and Doreen of My Little Favourite DIY and hosted by Ms B of Everybody Eats Well in Flanders.

This post is also linked to Cook-Your-Books #1 hosted by Joyce of Kitchen Flavours.

Saturday 22 June 2013

Nonya Fried Rice (MFF Penang)


I cannot resist fried rice. But this time I did. I cooked the Nonya Fried Rice for my family and only had a small mouthful to taste for seasoning. But before you say "Way to go, PH!", I have to confess that I later ate a piece of cheesecake. LOL!


When I saw this Nonya Fried Rice recipe in Nonya Flavours, I just had to try it. It is a little bit different from my grandma's version because grandma pounds the dried prawns with shallots, garlic and chilli. This recipe however calls for only the dried prawns to be pounded and sauteed with sliced shallots and minced garlic. I found it just as good and this is one of my favorite fried rice recipes.


Nonya Fried Rice
Recipe source : Nonya Flavours (page 162)

Ingredients :
- 2 tbsp cooking oil
- 3 eggs lightly beaten

- 6 tbsp cooking oil
- 40g (4) shallots, sliced
- 20g (2 cloves) garlic, chopped
- 50g dried prawns, soaked and pounded
- 150g prawns, shelled and diced
- 10g (2) dried shitake mushrooms, soaked and diced
- 1 tbsp chilli boh, or to taste
- 450g (4 cups) overnight cooked rice

Seasonings :
- 1 tbsp light soya sauce
- 1 tbsp oyster sauce
- 1/4 tsp salt or to taste
- 1/8 tsp pepper or to taste
- 1/8 tsp dark soya sauce (for color)

Garnish :
- 2 stalks spring onions, sliced
- 2 tbsp shallot crisps

Method :
1. Heat 2 tbsp oil in a wok, swirling to coat the sides and bottom well.
2. Pour in beaten eggs, swirling to coat the bottom in the widest circle.
3. Fry the eggs until cooked, turning over once.
4. Shred the omelette with the wok turner, dish out and set aside.
5. Reheat the wok and add 6 tbsp oil to saute the shallots and garlic until fragrant.
6. Add dried prawns and stir fry until aromatic and sizzling.
7. Add prawns, mushrooms and chilli paste. Stir fry for a minute or until aromatic.
8. Stir in the cooked rice and mix well with the seasonings.
9. Return the shredded omelette to the wok and mix well.
10. Dish onto plates and garnish with spring onions and shallot crisps. Serve hot.


I am submitting this post to Malaysian Food Fest Penang Month hosted by Alan of Travellingfoodies.

Wednesday 19 June 2013

Kaya Muffins


I love kaya (coconut and egg jam) and I have been experimenting with kaya muffins. I know there are quiet a number of recipes out there and I don't know which one to follow. 


This is my most successful kaya muffin so far. All I needed was a good basic muffin batter and then I can fill the muffin with kaya. My attempt prior to this one was a pandan kaya muffin but the batter was not quiet right. It was a bit dry and chewy perhaps because I did not add enough yogurt and oil. Or I could have over mixed the batter.


I have since doubled the amount of yogurt and oil and added another egg. The result was very satisfactory as the muffin was moist and fluffy. I was very pleased and I would like to share the recipe here.


I have not tried making kaya and one day I will. But for now, I use Gardenia's Auntie Rosie's kaya. I have tried other brands but this is my favorite.


Knowing how well kaya goes with butter, as in kaya butter toast, I added a bit of butter to the kaya filling. What I did was use those Ballantyne small pats of butter and cut it into 4 pieces, one piece into each muffin. Just half fill the muffin pan, add a teaspoonful of kaya, top with butter and cover with batter.

I know they look frightfully green.

Then it's off to the oven to bake at 160C for 22 minutes. I always check my muffins or cupcakes at the 20 minute mark to avoid overbaking. I used to have panic attacks back in those early days as I had trouble judging when a muffin is perfectly done. The skewer test sometimes fail. But now I know for sure 22 minutes is my magic number.


I didn't use liners this time because I find that sometimes muffins do look nice "naked". You can see the nicely browned batter and there's no hassle peeling off the liner and looking for a bin. This was from a much earlier batch which looks rather frightful but tasted quite OK :


After filling all my 12 muffins, there was still some kaya left and seeing that I had nothing better to do on a Saturday morning, I decided to use the excess kaya to pipe over the baked muffins.


I was very happy having achieved my ideal kaya muffin. Next time I want to do an improved pandan version.


Kaya Muffins
Recipe source : Phong Hong

Ingredients :
- 230 grams self-raising flour
- 1/2 cup sugar
- 2 large eggs, lightly beaten
- 1/2 cup extra virgin coconut oil (for the nice coconut aroma)
- 2 tubs plain yogurt (270ml)

For filling :
- 12 teaspoons kaya (cold so that it is firm and easier to handle)
- 12 small pieces butter (cold from the fridge)

Extra kaya to pipe on muffins (optional)

Method :
1. Preheat oven to 160C.
2. Lightly grease muffin pan and set aside. (Or you can use muffin liners)
3. In a mixing bowl add flour and sugar. Mix well.
4. In another mixing bowl, add yogurt, coconut oil and eggs. Whisk to mix well.
5. Pour the wet ingredients into the flour and sugar mixture.
6. Using a spatula, gently mix the batter until just combined.
7. half fill all the muffin holes.
8. Add a teaspoon of kaya into the middle of the batter and top with butter.
9. Fill up the muffin holes with the remaining batter to cover kaya and butter.
10. Bake for 22-25 minutes or until a skewer inserted into the centre of the muffin comes out clean.
11. Let the muffins cool for about 10 minutes before removing from the pan.
12. You can pipe some kaya on top of the muffins if you like.

Note : Can add pandan extract and green coloring to the batter for pandan version.

Saturday 15 June 2013

Green Curry Chicken (Opor Ayam Hijau)


The curry sure didn't look green while I was cooking it. It was more of a grey dull color but the green did show up eventually. Phew! When I first cooked this dish from Chef Wan's Simply Sedap, I was very diligent and pounded the spice paste by hand. But today, I am lazy and used my blender.


I am not certain if this is the same as Thai Green Curry but it tastes very similar. I had a green curry at a Thai restaurant in Taman Tun Dr Ismail a while back and it was very good. If I remember correctly, besides chicken, there were sweet potatoes and small brinjals in that curry.


The spice paste is very pungent and aromatic. It has a very robust flavor profile and may not suite everyone. One thing to keep in mind is to make sure your dry spices - coriander, fennel seeds and white peppercorns are fresh. Do check for any seeds that have gone bad or it will spoil your spice paste. I once realized that my peppercorns had already gone musty after I made the spice paste and sure enough, my curry smelled funny.


The vegetable in Chef Wan's recipe is brinjals, cut into small pieces and deep fried. I thought that was interesting and followed, except that I didn't cut all the brinjals into small pieces.


This curry goes really well white plain white rice. The aromatic gravy just makes you want to eat more and more. Not exactly something you would want if you are on a diet. If you love Thai Green Curry, then this curry is for you.


Green Curry Chicken (Opor Ayam Hijau)
Recipe source : Adapted from Chef Wan's Simply Sedap (page 108)

Ingredients :
- 4 chicken legs, cut into 4 pieces each
- 200ml coconut milk
- 100 ml water
- 5 small eggplants, cut into small pieces and deep fried
- A handful of Basil leaves (Daun Selasih)

Finely ground paste :
- 4 green chillies (I removed the seeds)
- 1 big onion
- 10 shallots
- 4 coriander root
- 1 inch ginger
- 2 stalks lemongrass
- 4 kafir lime leaves
- 1 teaspoon belacan (shrimp paste)
- 1.5 tablespoons coriander seeds, toasted
- 1.5 tablespoons fennel seeds, toasted
- 1/2 tablespoon white peppercorns, toasted

Method :
1. Heat oil and saute finely ground paste until fragrant.
2. Add the chicken pieces and stir to coat with spice paste.
3. Pour in the water and coconut milk and simmer until chicken is tender and gravy is thick.
4. Stir in the eggplants.
5. Season with salt and sugar.
6. Add basil leaves and remove from heat.


I am linking this post to the event, Little Thumbs Up organised by Zoe of Bake for Happy Kids and Doreen of My Little Favourite DIY and hosted by Ms B of Everybody Eats Well in Flanders.

This post is also linked to Cook-Your-Books #1 hosted by Joyce of Kitchen Flavours.

Tuesday 11 June 2013

Peach Cheesecake


Phong Hong Bakes indeed! I know you don't see that many bakes on my blog even though ahem, my blog title seems to suggest otherwise. Actually, I do bake but my problem is (1) the cake is ugly (2) the photo is ugly or (3) both. LOL! I do snap pics of the ugly cakes or even the failed ones for posterity. I made brownies a few times but the photos were not decent at at all. How do you people get such pretty brownie pictures, I really don't know. Mine looked like gobs of brown or black and I have since given up.


This Peach Cheesecake came about after I saw the recipe for Spiced Plum Cheesecake in the book Favourite Cupcakes and Cheesecakes. It looked rather pretty and since I don't have any spiced plums, I decided to substitute with canned peaches. The recipe uses Kashta cheese, a middle eastern cheese, something I am not familiar with. So I used regular cream cheese.


Unlike the usual cheesecakes that I am used to, the batter uses egg separation method, pretty much like Ogura Cheesecake.  The base is made of a combination of sweet biscuits (I used the usual digestive biscuits) and almond meal. 

I love the texture of this cheesecake because it is light and creamy unlike New York style cheesecake which is more on the dense and heavy side. I think this is due to the egg separation method. And due to the light texture, it was very easy to slice. However, I didn't like the almond meal base. It tasted funny to me and the next time, I will leave it out and use only digestive biscuits as the base.


Another thing is, it is best to use peach halves. I discovered to my horror that the canned peach I bought was in slices which I had used for the Peach Upside Down Cake. But it was too late and still it turned out alright. If you use peach halves, it is easier and saves more time when arranging the peaches on the cake base.

My cake was slightly underdone at the middle but it was OK as this type of cheesecakes is very forgiving. I had baked the cheesecake for 1 hour and perhaps another 10 minutes would have been perfect.

This cheesecake is a keeper and there are other combination of fruits and ingredients that you can use. It is really delicious and and very easy to put together.


Peach Cheesecake
Recipe source : Adapted from Spiced Plum Cheesecake from Favorite Cupcakes and Cheesecakes (page 143)

Ingredients :

For the base :
- 50g melted butter
- 75g almond meal (In future I will omit this)
- 75g disgestive biscuits, finely crushed (In future to use 150g due to omission of almond meal)

For the filling :
- 825g canned peach halves, drained
- 250g cream cheese
- 1/3 cup sour cream
- 1/3 cup caster sugar
- 1 teaspoon vanilla extract
- 1/3 cup hot milk
- 1/4 cup custard powder
- 4 large eggs, separated

Method :
1. Combine the butter, digestive biscuits and almond meal in a bowl and mix well.
2. Press into a 9 inch springform pan and bake at 140C for 10 minutes (you can skip baking the base if you like)
3. Arrange the peaces, cut side down over the base.
4. Place cream cheese, sour cream, caster sugar and vanilla extract in an electric mixer and beat until smooth.
5. Add the hot milk and neat until smooth.
6. Then add the custard powder and egg yolks and mix well.
7. In a clean bowl, whisk the egg whites to firm peaks.
8. Fold into the cheese mixture and then pour over the peach base.
9. Bake at 140C for 1 hour 20 minutes or until a skewer inserted in the center of the cake comes out clean.
10. Run a spatula around the inside of the tin immediately after it is removed from the oven.
11. Cool and chill.


This post is linked to Cook-Your-Books #1 hosted by Joyce of Kitchen Flavours.